

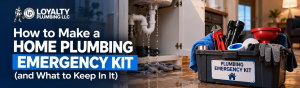
Plumbing emergencies never arrive at a good time. A pipe lets go on a Sunday night, a toilet overflows while guests are over, or a drain backs up at midnight. In those moments, you do not want to be hunting for a flashlight, digging through the garage for a wrench, or driving to the hardware store with water on the floor.
A plumbing emergency kit solves that. It is a small box or bucket you put together once and keep somewhere easy to reach. It will not replace a licensed plumber, but it can help you stop the water, limit the damage, and stay calm until professional help arrives.
Quick answer: A home plumbing emergency kit should include a flashlight, towels and a bucket, a plunger, an adjustable wrench, plumber’s tape, a pipe repair clamp or repair tape, rubber gloves, a drain snake, and a card with your main shut-off valve location and your plumber’s phone number. Keep it where everyone in the house can find it quickly.
Why a Kit Is Worth the Few Minutes It Takes
When water is spreading, speed matters. A burst or leaking pipe can release a lot of water in a short time, and every extra minute adds to the damage to floors, walls, and belongings. Having the basics in one place lets you act right away instead of scrambling.
A kit also helps in less dramatic situations, like a clogged toilet or a stubborn drain on a holiday weekend, when it may take time to get help.
What to Put in Your Plumbing Emergency Kit
Start with the essentials, then add extras as your budget and space allow.
The Must-Haves
- Flashlight or headlamp (with spare batteries). Main valves, water heaters, and crawl spaces are often dark. A headlamp keeps both hands free, and plumbing emergencies sometimes happen during power outages.
- Old towels and rags. For soaking up water, wrapping a leaking pipe temporarily, and keeping drips off the floor.
- A bucket (or two). To catch drips from a leak, and to bail water when needed.
- Rubber gloves. Especially important if you are dealing with a backup or any dirty water.
- Adjustable wrench. This helps with shut-off valves under sinks and behind toilets, and supply line connections.
- A plunger. A cup plunger is good for sinks and tubs. A flange plunger (with the extra rubber lip) works better for toilets. If you have room, keep both.
- Plumber’s tape (Teflon tape). For sealing threaded connections that are weeping.
- Pipe repair tape or a pipe repair clamp. These are made to wrap or clamp over a small leak as a temporary fix. They are not permanent, but they can slow water down until a plumber arrives.
- A small drain snake or hand auger. For simple clogs in sinks and tubs that a plunger will not clear.
- A water meter key or valve wrench (if your main valve needs one). Some main shut-off valves and meter boxes require a special tool. If yours does, keep it with the kit.
The Nice-to-Haves
- Wet/dry vacuum for pulling water off floors fast
- Waterproof tarp or plastic sheeting to protect furniture and belongings
- Pipe insulation sleeves for cold-weather protection
- Spare supply hoses for toilets and faucets
- Silicone sealant
- Safety glasses and a pair of sturdy work gloves
- Phone charger or power bank, so you can call for help and take photos
Add an Information Card
The most useful thing in your kit might not be a tool at all. Write a simple card and tape it inside the lid with:
- The location of your main water shut-off valve
- The location of your water heater shut-off (and the breaker or gas control)
- The location of your electrical panel
- The phone number for your gas utility
- Your plumber’s phone number
- Your home insurance company and policy number
When you are stressed, it is easy to forget things. A card takes the guesswork out, and it helps anyone else in your home, like a teenager, a house sitter, or a family member, take the right steps.
Where to Store Your Kit
Keep your kit in a spot that is dry, easy to reach, and known to everyone in the household. Good places include a utility closet, a hall closet, or a shelf near the garage door. Avoid burying it behind holiday decorations or in the attic.
Use a plastic tote or a bucket with a lid, and label it clearly, like “PLUMBING EMERGENCY KIT.” Check it every six months, replace anything that is missing, and swap out the batteries.
How to Use Your Kit in Common Emergencies
Having the tools is half the job. Here is how to put them to use.
A Burst or Leaking Pipe
- Shut off the main water valve.
- Open faucets to drain what is left in the lines.
- Place buckets under drips and use towels to protect floors.
- If safe, wrap the leak with pipe repair tape or attach a repair clamp.
- Call for emergency plumbing help.
If you cannot tell where the water is coming from, or it seems to be inside a wall or under a floor, professional leak detection and repair can find the source without tearing everything apart.
A Clogged Toilet or Drain
- Put on gloves and lay down towels.
- Use the correct plunger and give it steady, firm plunges, not quick jabs.
- For a stubborn sink or tub clog, try the drain snake.
- Skip the chemical drain cleaners, which can be harsh on pipes and risky if someone has to work on the drain later.
If the same drain keeps clogging, or more than one fixture is backing up, it is time for professional drain cleaning rather than another round of plunging.
A Sewage Backup
- Stop using all water in the house, including toilets, sinks, and the washer.
- Wear gloves and keep kids and pets away from the area.
- Do not try to clear a main line backup yourself.
- Call a professional right away.
A backup that affects several fixtures usually points to a main line problem, which needs expert sewer line services.
A Leaking Water Heater
- Turn off the power (electric) or set the gas control to off or pilot (gas).
- Close the cold water supply valve on top of the heater.
- Use towels and a bucket to contain the water, and keep your distance from hot water on the floor.
- Call a professional. A leaking tank cannot be patched, so water heater repair or replacement is usually the next step.
What Your Kit Is Not For
A kit is for buying time, not for major repairs. Do not try to:
- Repair gas lines or anything near a gas smell (leave the house and call your gas utility or 911)
- Cut into walls or remove sections of pipe
- Work on electrical items while standing in water
- Replace a water heater yourself
- Fix a main sewer line
Temporary fixes like tape and clamps can slow a leak, but they are not permanent. Always follow up with a licensed plumber.
Make It Even Better: Schedule a Checkup
The best emergency is the one that never happens. A plumbing inspection can catch worn valves, small leaks, and aging connections before they turn into a flood, and it is a good way to confirm your shut-off valves actually work.
Your Plumbing Emergency Kit Checklist
- Flashlight or headlamp, plus spare batteries
- Old towels and rags
- Bucket
- Rubber gloves
- Adjustable wrench
- Cup plunger and flange plunger
- Plumber’s tape
- Pipe repair tape or clamp
- Small drain snake
- Water meter key (if needed)
- Information card with valve locations and phone numbers
- Phone charger or power bank
Frequently Asked Questions
What should be in a plumbing emergency kit?
At a minimum: a flashlight, towels, a bucket, gloves, an adjustable wrench, a plunger, plumber’s tape, pipe repair tape or a clamp, a drain snake, and a card with your shut-off valve locations and plumber’s number.
Where should I keep a plumbing emergency kit?
Keep it in a dry, easy-to-reach place, like a utility closet or near the garage entry, and make sure everyone in the home knows where it is.
Can I fix a burst pipe with repair tape?
Repair tape and clamps can slow or stop a small leak temporarily. They are not a permanent fix, so you should still have a licensed plumber repair or replace the damaged section.
How often should I check my emergency kit?
Every six months is a good habit. Replace missing items and check that your flashlight batteries still work.
What is the first thing to do in a plumbing emergency?
Shut off the main water supply. This stops more water from entering the home and limits damage while you wait for help.
Be Ready for the Unexpected With Loyalty Plumbing
At Loyalty Plumbing LLC, we believe craftsmanship and loyalty are what great plumbing is built on. A kit helps you stay calm and in control, and when it is time for the professionals, our licensed team is ready to help with honest pricing and work done right the first time. Save our number in your kit and on your phone.
Let our loyalty meet your plumbing needs.
- Residential plumbing
- Licensed and experienced
- Fast response, honest pricing
- Emergency service available
- Serving Greater Houston and Bryan/College Station areas
Call (832) 298-3113
Request a Free Service Estimate